Sitecore 8.2 has been released and it brings a new option for publishing Sitecore Items – Sitecore Publishing Service. This is a feature that my brother Mike Robbins worked on and been so tight lipped about, so it only makes sense for me to dig in to see what it’s all about.
So why use the new Publishing Service? Simply put, it takes less time to publish items, especially large amounts, it is more reliable and provides better User Experience and feedback.
First off, rest easy – the old publishing process from prior versions still exists and is enabled by default. In order to switch your publishing to be handled by the new Sitecore Publishing Service, there are a number of installation steps that need to be completed. I’ll cover how you go about that.
Overview
To gain an insight how the new Sitecore Publishing Service works its best to quickly go over a few of its concepts;
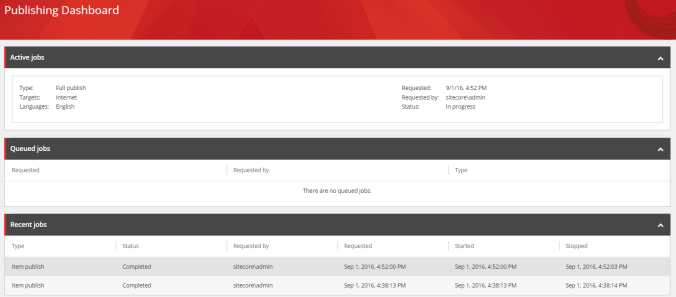
- Publishing Jobs – All publishes are handled via a job and added to a queue to be processed as soon as possible. Therefore the interface is no longer tied up by the publishing dialog. All current and recent publishes can be viewed in the Publishing Dashboard – no longer will you need to keep that dialog open to keep track / get feedback.
- Manifests – The collective name for all the tasks the Publishing Service will complete, items that are valid to be published i.e. no publish / workflow restrictions etc are added to the Manifest. The complete manifest is determined at the start of the publishing process. Each publishing target will have its own Manifest.
- Promotion – The process of moving the Items and Data described in the Manifest from the source to the target databases. Items are processed in batches, configurable in size, compared to the old Sitecore publish which published one Item at a time.
- Manifests Results – The changes that were made as a result of promoting the manifest.
- publishEndResultBatch pipeline – this pipeline is initiated at the end of the publishing job. This is the best place to customise the publishing process, more on that later.
Sitecore Publishing Service is made up of two components.
- Sitecore Publishing Host – service that runs independently from your Sitecore instance. It is responsible for processing the items that are to be published.
- Sitecore Publishing Service Module – Sitecore package containing the new UI Elements and configures a connection to the Publishing Host.
The Sitecore Publishing Host needs to be installed first and has a dependency on .NET Core. Additionally, Sitecore recommend running it under IIS which requires installing Windows Server Handling package. Let’s get those prerequisites solved first.
Installing .NET Core
Before installing Sitecore Publishing Service you will need to install .NET Core. If you don’t have .NET Core installed on the machine head to the following link https://www.microsoft.com/net/core. Find the download for your OS then run the installer.
Once installed you’re going to need initiate .NET Core via some commands in Command Line. Make sure you run CMD as Administrator. The commands you need to enter are outlined on the download page above. Once executed you will have installed .NET Core.
Installing Sitecore Publishing Host
First off, the official recommendation from Sitecore is to run the Service under IIS. In order to do that, Windows Service Hosting will need to be installed. Which can be found here – https://www.microsoft.com/net/download#core. Complete the install and you’re good to go.
Finally, let’s work on the Sitecore side of things. Head over to the download page of Sitecore Publishing Service and download the Host resource. This is the Service that will process our items we selected to publish.
There are two options to installing the Host; manual or scripted. Both are valid approaches but I’ll cover scripted here.
- Extract the Sitecore Publishing Service Host zip somewhere you typically store IIS applications. Recommend naming the folder based on the instance we’ll be publishing for
- e.g. C:\inetpub\wwwroot\sc82rev160729Publishing
- In your website’s connection strings (not the Publishing Service’s) add the attribute MultipleActiveResultSets and set it to true on the databases involved in publishing typically Core, Master and Web
- e.g. connectionString=”Data Source=(local)\SQLEXPRESS;Initial Catalog=sc82rev160729Sitecore_web;Integrated Security=False;User ID=sa;Password=password;MultipleActiveResultSets=True;”
- Now to create the connection strings for the Service. Open Powershell as Administrator and change the directory to the path of the service and run the following command (but change the connection string value). It will create a custom file containing a connection string in the global folder
- e.g. .\configure.ps1 -connectionstring -key ‘master’ -value ‘user id=sa;password=password;data source=(local)\SQLEXPRESS;database=sc82rev160729Sitecore_master’
- If you encounter the digitally signed error, right-click on the configure.ps1 file, properties then ‘Unblock’ and re-run
- You’ll want to repeat or modify the file yourself to add connections for Web and Core database
If you prefer you can use the following xml config instead.
This file contains bidirectional Unicode text that may be interpreted or compiled differently than what appears below. To review, open the file in an editor that reveals hidden Unicode characters.
Learn more about bidirectional Unicode characters
| <Settings> | |
| <Sitecore> | |
| <Publishing> | |
| <ConnectionStrings> | |
| <Master>user id=sa;password=password;data source=(local)\SQLEXPRESS;database=sc82rev160729Sitecore_master;MultipleActiveResultSets=True;</Master> | |
| <Web>user id=sa;password=password;data source=(local)\SQLEXPRESS;database=sc82rev160729Sitecore_web;MultipleActiveResultSets=True;</Web> | |
| <Core>user id=sa;password=password;data source=(local)\SQLEXPRESS;database=sc82rev160729Sitecore_core;MultipleActiveResultSets=True;</Core> | |
| </ConnectionStrings> | |
| </Publishing> | |
| </Sitecore> | |
| </Settings> |
Note that all configs for Publishing Service should begin with the ‘sc.’ prefix so that they are included in the configuration.
- Next set the service up in IIS via the following command
- e.g. .\install.ps1 -sitename ‘sc82rev160729Publishing’ -appPoolName ‘sc82rev160729Publishing’ -port 80
- Finally, run the schematool.exe to create a new publishing table in the specified databases
If you browse to http://<url of service>/api/publishing/operations/status/ you should see a response {“status”:0}. If not, there is likely an error with your connectionstrings or installs. Once resolved, perform an app recycle to flush the errors.
That’s the host set up. Now onto the Service.
Installing Sitecore Publishing Service
The Sitecore Publishing Service Module comes as a Sitecore package but does require manual changes once installed. Download the Sitecore Publishing Service Module from the Sitecore Site and install the package as you would any other Sitecore package.
Once the installation has been completed browse to your site’s includes folder to create a new Patch config which will override the default setting to tell your site the Url of the Publishing Host we created. See below
This file contains bidirectional Unicode text that may be interpreted or compiled differently than what appears below. To review, open the file in an editor that reveals hidden Unicode characters.
Learn more about bidirectional Unicode characters
| <configuration xmlns:patch="http://www.sitecore.net/xmlconfig/"> | |
| <sitecore> | |
| <settings> | |
| <setting name="PublishingServiceUrlRoot">http://sc82rev160729publishing/</setting> | |
| </settings> | |
| </sitecore> | |
| </configuration> |
If you are configuring Content Delivery servers, ensure the dll Sitecore.Publishing.Service.Delivery.dll is present in the bin folder and that the file Sitecore.Publishing.Service.Delivery.config is present and enabled.
Give permission to full publish
A decision of Sitecore’s that I am happy about is that security of who has permission to perform a full republish is now controlled in a config file. You can’t grant permission to perform a full site publish to a user/role via the Security Roles in Sitecore anymore.
Meaning we should get less rogue Content Editors completing a full publish each time they change a single item. Awesome.
You can modify which roles can complete a full republish via the allowedFullPublishRoles setting in the Sitecore.Publishing.Service.config. You’ll need to define the role in the format domain\rolename. Recommend you patch this in as well.
Publishing, but faster
Now you’re all set up! Significantly more performant publishing achieved simply. Give it a try and you should see much-improved interface and feedback when publishing;
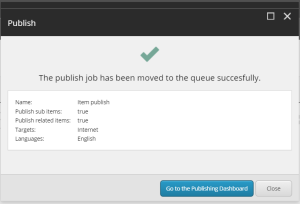
The publishing is so rapid, its pretty difficult to catch a Publish in the Active Jobs list. Good thing there is a Recent Jobs list, that’ll be handing to see how keeps kicking off a publish.
Customising publishing – publishEndResultBatch
As you might have guessed there are a number of new configs that the Publishing Service uses. In fact, it does not use any of the existing configurations for the out-of-the-box publishing. These new configs can be found in the App_Config/Includes folder beginning with Sitecore.Publishing.
If you want to add additional steps to publishing you will want to look at the publishEndResultBatch located in the Sitecore.Publishing.Service.config. This event pipeline is initialized after each batch of items have been published. The PublishEndResultBatchArgs will give you everything you need to access all the items from the batch. Meaning you can complete typical tasks of updating site maps etc.
And that’s it!
I may have been a little bias digging into the Publishing Service ahead of other new parts of 8.2 but the Sitecore Product Team and Mike have done a really great job. A few of our bigger clients complain about the performance of publishing 1000s of items in one go.
But it goes beyond the benefits of an improved publish. It’s about adopting and integrating .NET Core into the heart of Sitecore. Meaning everyone will feel the benefit of .NET Core and so soon. This really is an exciting time to be a .NET and Sitecore developer.
If you want further reading on the various configuration of the Publishing Service have a look at the official configuration document.

Pingback: Sitecore Publishing Service: BulkPublishingEnd – João Neto's blog
Great article Jonathan, the issue that I am experimenting is that when I publish I get the followin:
Could not resolve stores: ‘Web’ of type target
LikeLike
I have the same issue. Did you figure this out?
LikeLike
Sorry if this is a duplicate, but it didn’t show that my first submission was waiting for moderation.
The underlying source of the problem is that when Sitecore is shipped, its default publishing target is called “Internet”. I changed the /sitecore/system/publishing target “Target Database” field value to “web”, because that’s the way that my users are accustomed to seeing it.
If you look in the Publishing Service files, in the /config/sitecore/publishing directory, there is a file called sc.publishing.xml. Inside of the node, there is an area to add additional targets. This file comes by default with the node named . The Sitecore Publishing Service documentation states that you’re not supposed to edit any of the files within the /sitecore folder, but I couldn’t see any way to patch this value. Maybe someone with more knowledge in these things can recommend a better method. But this works for me.
Change:
…
I renamed the node to “web” to match my Target Database value.
…
The site is now publishing.
LikeLike
Looks like this editor removes tags. Change the Targets/Internet node, to Targets/YourWebTargetName
LikeLike
Hi Jonathan. We came across and issue where we found publishing Datasource Changes does not always work. We’ve found another interesting possible issue with the Publishing Service (v2.0). When we change the Datasource for a rendering in an item’s presentation details (and nothing else), then publish that item, the change sometimes doesn’t make it to the Web database.
To reproduce the issue we had to change the datasource to different things and publish four or five times, but our content authors have reported it happening on the first change.
If we then publish the item With Subitems it seems to push out the datasource consistently, but it’s of course possible that that’s coincidence.
Do you have any idea on this? I am wondering if it is a bug or config issue. Thanks.
LikeLike
Pingback: Sitecore Publishing Service 2.0 – How to setup a publishing target |
Hey Jonathan, I’m having and issue with custom publishing targets, in my Sitecore instance I have a custom target named “Singapore” which uses a connection string to a remote Sitecore instance (web database). With the standard Sitecore publishing method it works fine when publishing to this target, but it doesn’t work out of the box with the new publishing service, I can’t figure it out how to setup a custom target from the documentation… have you ever configured a custom publishing target with this new service? if so, could you please help me with some steps or something in order to get it working.
The error that I’m getting it this: Could not resolve stores: ‘Singapore’ of type target
Thanks!
LikeLike
Geykel, see my response to Juan above. I think it might help you too.
LikeLike
Hi Jonathan,
Thanks for nice article. I tried to follow your article step by step and even from Sitecore but I am getting an error while browsing http:///api/publishing/operations/status/
Error I am getting is:
HTTP Error 500.19 – Internal Server Error
The requested page cannot be accessed because the related configuration data for the page is invalid.
Module IIS Web Core
Notification Unknown
Handler Not yet determined
Error Code 0x8007000d
Config Error
Config File \\?\C:\sitecorepublishing\web.config
I have given full access writes to IIS users and everyone too. Even there is nothing wired in web.config too. Here is my web.config:
Also, when i explore the folder location I am not seeing path ‘api/publishing/operations/status/’.
I am stuck from couple of days. Any suggestions?
Thanks and regards,
Amit Mahajan
LikeLike
Hi Jonathan. Great article. But I am facing some issues 1.in accessing http:///api/publishing/operations/status/ . This kind of folder structure is not getting created in service directory. also 2. in my global folder sc.custom.json file getting created not sc.connectionstrings.xml.
LikeLike
Pingback: Benchmarking Sitecore Publishing - Sixteen Pieces of Flair
Pingback: Sitecore Publishing Service – Publish Types – The Sitecore Zone
Glad you able to figure it out. From the error message you were getting it sounded like a networking issue
LikeLike
Hi Jonathan, when I run schematool.exe -upgrade I received next error :2016-09-03 18:37:39.873 +03:00 [Error] One or more errors occurred.
2016-09-03 18:37:39.905 +03:00 [Error] A network-related or instance-specific error occurred while establishing a connection to SQL Server. The server was not found or was not accessible. Verify that the instance name is correct and that SQL Server is configured to allow remote connections. (provider: SQL Network Interfaces, error: 26 – Error Locating Server/Instance Specified) Also when I run schematool.exe -list I have error. My connection strings are correct.
LikeLike
I fixed my issue. I just restarted my Sql service.
LikeLike
Thanks Jonathan! This capability is definitely welcome – removes the mystery about where you are in the queue for distributed authoring team and bumps up the speed. I skimmed and didn’t see anything about multi-threading for publish processes; is that still a separate configuration in 8.2+? Also, does a standalone publishing service count toward your Sitecore instance licensing limit?
LikeLike
Hi John, the code makes use of Await Sync so there is support for multithreading. Additionally, there is a configuration setting so that publishing to the Publishing Targets can be synchronous or asynchronous.
The Publishing Service root doesn’t require the standard Sitecore licence file and neither does the code to execute. As long as the Service is running on a server which has a licenced Sitecore Instance on it, I don’t think it would be an issue. However, if you already using the servers your licence allows and you want to run the Publishing Service on a new server that’s where it might become a bit of a grey area. I’d recommend double checking with your Sitecore Account Manager to be sure
LikeLike
Stephen Pope at Sitecore has just confirmed at Sitecore Symposium that a Sitecore Licence isn’t required for Publishing Service
LikeLike
Hey! Great stuff, thanks for blogging this!
I have a question – I wonder how you would be able to use the publishing service if your instance of Sitecore is installed on an Azure WebRole?
LikeLike
Hey Phil, I’m not overly familiar with Azure’s WebRoles from what I do know it should be fine as long as you can get to your Sitecore Instance’s configs to point at the URL of the Publishing Service. The Publishing Service is separate from the instance also.
LikeLike